Wednesday, July 9, 2014

Book Review Wednesday: Anna Dressed In Blood & the Sequel

Hello, All!

Today we will be reviewing Anna Dressed In Blood & The Sequel.


 Now, I should tell you that I am not a horror fan AT ALL!! At first, I only read Anna Dressed In Blood because of the mention of my name and concept that I was apparently covered in blood. I had originally found this book when a good friend and I were hiding out in the teen library section from a Teen Fandom Con that had gone horribly wrong. The friend had pointed out the book as we had wrapped up filming the horrors of 40 year-olds dressed up as a My Little Pony characters. A few days later, I borrowed the book from my library and set in reading...at 10:00 at night. BIG mistake! I read only a page or two before I realized that reading a horror book at night wasn't the smartest. Early in the morning, I again started the book and was in for a big surprise... 


Pretty much this is the plot: Theseus Cassio Lowood, other wise known as Cass,  has inherited the family business; killing the undead. When his father was brutally murdered by a ghost when Cass was 7, Cass inherited his father's prized athame and setted out killing the unruly undead himself. Now, Cass is a teenager in high school and has no room for pesky things like friends... until he moves to Thunder Bay, Ontario, in search of a ghost named Anna Dressed in Blood. Anna, as a young lady, was murdered in 1958 and now haunts the house in which she lived during her life, and kills anyone foolish enough to come inside. Until Cas stumbled in. For some reason, she spared his life. Along with finding out why Anna spared his while throwing away countless others, Cass makes a few friends along in this freshly, unique protagonist and voice by Kendare Blake.

Surprisingly, I found that I was drawn into this book and enjoyed it whole-heartedly. I found that it was at some times humorous and had some romance in it that made it interesting. Yes, it was very gruesome at times ( I think my nose was continuously wrinkled the whole book), but it IS horror. Over all, I felt that the characters were very well-written and had layers that I appreciated.

There are two problems I would like to address in this book first before I rate it. The first is that this is definitely not for young adults although it is rated for them. This is not a light book and there is intense gore and  swearing.
The second problem is that I felt like I wanted to strangle the characters sometimes. Why? Because it felt like they couldn't just EXPLAIN their problems to each other. This, I find, happens in almost all the books I read, so it's not really a surprise for me, but I felt like I had to warn other fellow book readers. Other than these few problems, I enjoyed the book and thus rate it a grand 4 and 1/2 stars!

On to the sequel! Girl of Nightmares, the sequel, was equally captivating as Anna Dressed in Blood was, and that delighted me tremendously. For this book, I won't give the plot away, but I will give you some titbits. The gore factor declines in this book, though the creepy factor has gone up. The ending was also satisfactory as it was perfect for a reboot if Kendare Blake ever feels the need to start the series again.

Overall, I really enjoyed this series and would absolutely recommend to anyone who wants a quick horror series to pass the time.

See you all Saturday!

Saturday, July 5, 2014

Book Nook


Hello! Hope you all had a great fourth of July! I sure did! ( We played with sparklers)


 Lately, I have been on Pinterest looking at closet book nooks. I definitely wanted one, but really, who has a empty closet ready for a makeover? So I thought, why not just make a temporary book nook? This temporary book nook would just be perfect for a rainy day that could be set up for a day or two. I found a part of my closet  that was I could comfortably fit in and covered the ground the with blankets. If you have carpet, cover the ground with two blankets. If you have a hard floor like I do, I suggest laying down a rug, and then two blankets.


Next, I hung some light and fancy blankets from a shelf above me to give the look that I wasn't reading in a closet.


Since I have shelves that are sliced, I easily put a flash light on the top shelf so the light could shine threw the blankets.

This craft was done in a few short minutes and I was very pleased with the results. This would be perfect for some little kids on a rainy day! Happy Reading!


Sunday, June 22, 2014

Altoid Tin First-Aid Kit


Hello, All!

Today, we will be learning how to make a, you guessed it, Fist-Aid Kit out of a Altoid Tin. Before I go in, I should tell you that I did not post on Saturday because I had a biking accident Friday, and my muscles were inflamed Saturday. As far as accuses go, I think that is a pretty good one. :)

~This what you'll need~

  • Altoid Tin
  • Paper of your choice
  • Your First-Aid equipment
  • Glue

If you would like an Altoid Tin with fabric on it instead of paper, please go to this site!


What you should first do is cut out your paper so you can glue it on your altoid tin. Make sure your paper does not go over the sides. Remember to put the tell-tell hospital cross on the front!


Next, put the same kind of paper inside the altoid tin and put the neccasary information on it. With this first-aid kit, I had a cute, girly font to match my type of paper.


Finally, pack the necessary type of emergency equipment into your altoid tin. I suggest putting the gauze on the bottom and making layers. Don't forget to pack tightly as it won't jostle if you do.


Thank you all! See ya Wednesday!

Wednesday, June 11, 2014

Book Review: William Shakespeare's The Empire Striketh Back

Hello! 
Now, you might be wondering why I'm posting on a Wednesday. Well, I have decided that since I am an avid reader I will post a book review every 2nd and 4th Wednesday of the month. On every 1st and 3rd Saturday of the month there will be a craft or DIY.

The book I will be reviewing today is called William Shakespeare's The Empire Striketh Back.


This book is by Ian Doescher and is now a trilogy with William Shakespeare's Star Wars and William Shakespeare's The Jedi Doth Return completing the series. This book tells the story of the fifth Star Wars movie, but retold in Shakespeare’s greatest plays. Along in the book series are twenty gorgeous Elizabethan illustrations (pics below).


 After completing this book in one sitting, I found that I actually quite liked the book and even found it humorous at times; something I wasn't expecting. Other than the fact that it took a little while for me to get into the book, there wasn't anything I was majorly disappointed in. I followed the story well enough that I knew what was happening and I could relate it back to the movie; anything a simple Star Wars fan can do. Also, I could see where William Shakespeare’s style falls as this familiar story is organized into prologue, acts, and scenes, as well as with many of the trappings of a Shakespearean drama: iambic pentameter, choruses, asides, soliloquies, and the elegant language of the Bard. 

In conclusion, I gladly give this book 5 stars and will happily recommend it to  anybody with a loveof Star Wars, William Shakespeare's plays, and parodies.

Props to you, good Sir Ian Doescher! 


Side Note! If anybody would like me to review a book for them, please leave the title of the book in the comments. Thank You!


Saturday, June 7, 2014

TFIOS MOVIE REVIEW!!!!!!!

Why, Hello People!

How are you on this fine, fine day? Good? Well, it soon won't be when you see the Fault In Our Stars Movie! No, I am NOT bad-mouthing TFIOS, just saying that when you come out of the movie theatre you will mournfully bewail the lost of Augustus Water...until you realize he is very much alive, but in the form of Ansel Elgort. Then, you will be emotionally drained the rest of the day. Ahhh, the life of a fangirl.

Now, on to the movie review. Well, let's just say it was a masterpiece. No? You don't believe me? Fine. I'll prove it to you. 

1. Ok, the first thing that really stood out to me was the way...Hazel and Augustus looked... so normal. Usually, main characters in movies always have the perfect outfits and perfect hair ( which, frankly, has always bothered me because it was not relatable.)Now, in the TFIOS movie, Hazel always has minimal make-up on, wears sweatpants, and does not have perfect hair (though it does look cute). Now, Augustus, if you look closely, DRESSES LIKE A REAL BOY!!!!  He has no style sense! I love this! You know why? Because many boys don't have style sense. Especially teenage boys. Also, when Augustus wears his jacket or any other layering of clothing, he always has a duck tail.  It is just relatable.

2. It is not sugar-coated. Period.

3. This movie is not a roller-coaster that only goes up; it's a roller-coaster that spins and twirls. During the movie, you will also have a roller-coaster of emotions. One minute you are celebrating and thinking everything will be alright! next, you are sobbing uncontrollably along with the rest of the audience.  These are the best kind of movies; movies that will have you feeling a wide-range of emotions.

4. They stuck to the book; you know it will be a good movie when they stick to the book.


Ok, my rambling is over!  Hoped you enjoyed my review and hopefully decide to see the movie!


Wednesday, May 21, 2014

Teacher Appreciation Week & Pusheen the Cat


Hi all!

Sorry I've been gone soooooooooo long! But hey, don't worry! I'm now on summer break and as free as a bird! Now I can post AS MUCH AS I WANT ( probably on Saturday nights, so look for my posts then)!! Now, I know that most people are STILL in school, and you might not have a teacher gift yet. Well, here's a great craft ( and cheap) craft that just involves some apples and paper.


Cute, aren’t they? And pretty easy to make too! This is what you'll need:

  • Apples ( With Stems)
  • Green Paper
  • Hole Puncher
  • A Cute Note
  • String
Now, measure the note you want to put on the leaf; this is crucial cause you want the leaf to bigger than the note. Now, cut out your desired leaf and refer back to the measurements of note often. Glue note onto the leaf. Hole-punch the leaf,tie string around note and stem, and viola! Teacher gift done!

Any who, I was surfing the internet ( Illegally, may I just say. I was supposed to be working on a rough draft. I'm such a rebel.) and came across Pusheen the Cat. Cue the pics!!


And my favourite...


 HAHAHA! I think I'm addicted.


Bye all! And...


Sunday, April 13, 2014

Yay! Easter!

Hello friends!


Can you believe it? It's almost Easter! This saturday my church had our annual Easter egg hunt, and...it was awesome. I highly recommend doing a Easter egg hunt, whether at your local church or in your own backyard.

Here are some picturesque places  to hide your eggs.


Trees are a great place to hide your eggs, BTW. Anyway, your probably wondering where my craft is. And... I don’t have one. I (graciously) decided to give you a break. Just enjoy the pics!!!!


Farewell!

Saturday, March 22, 2014

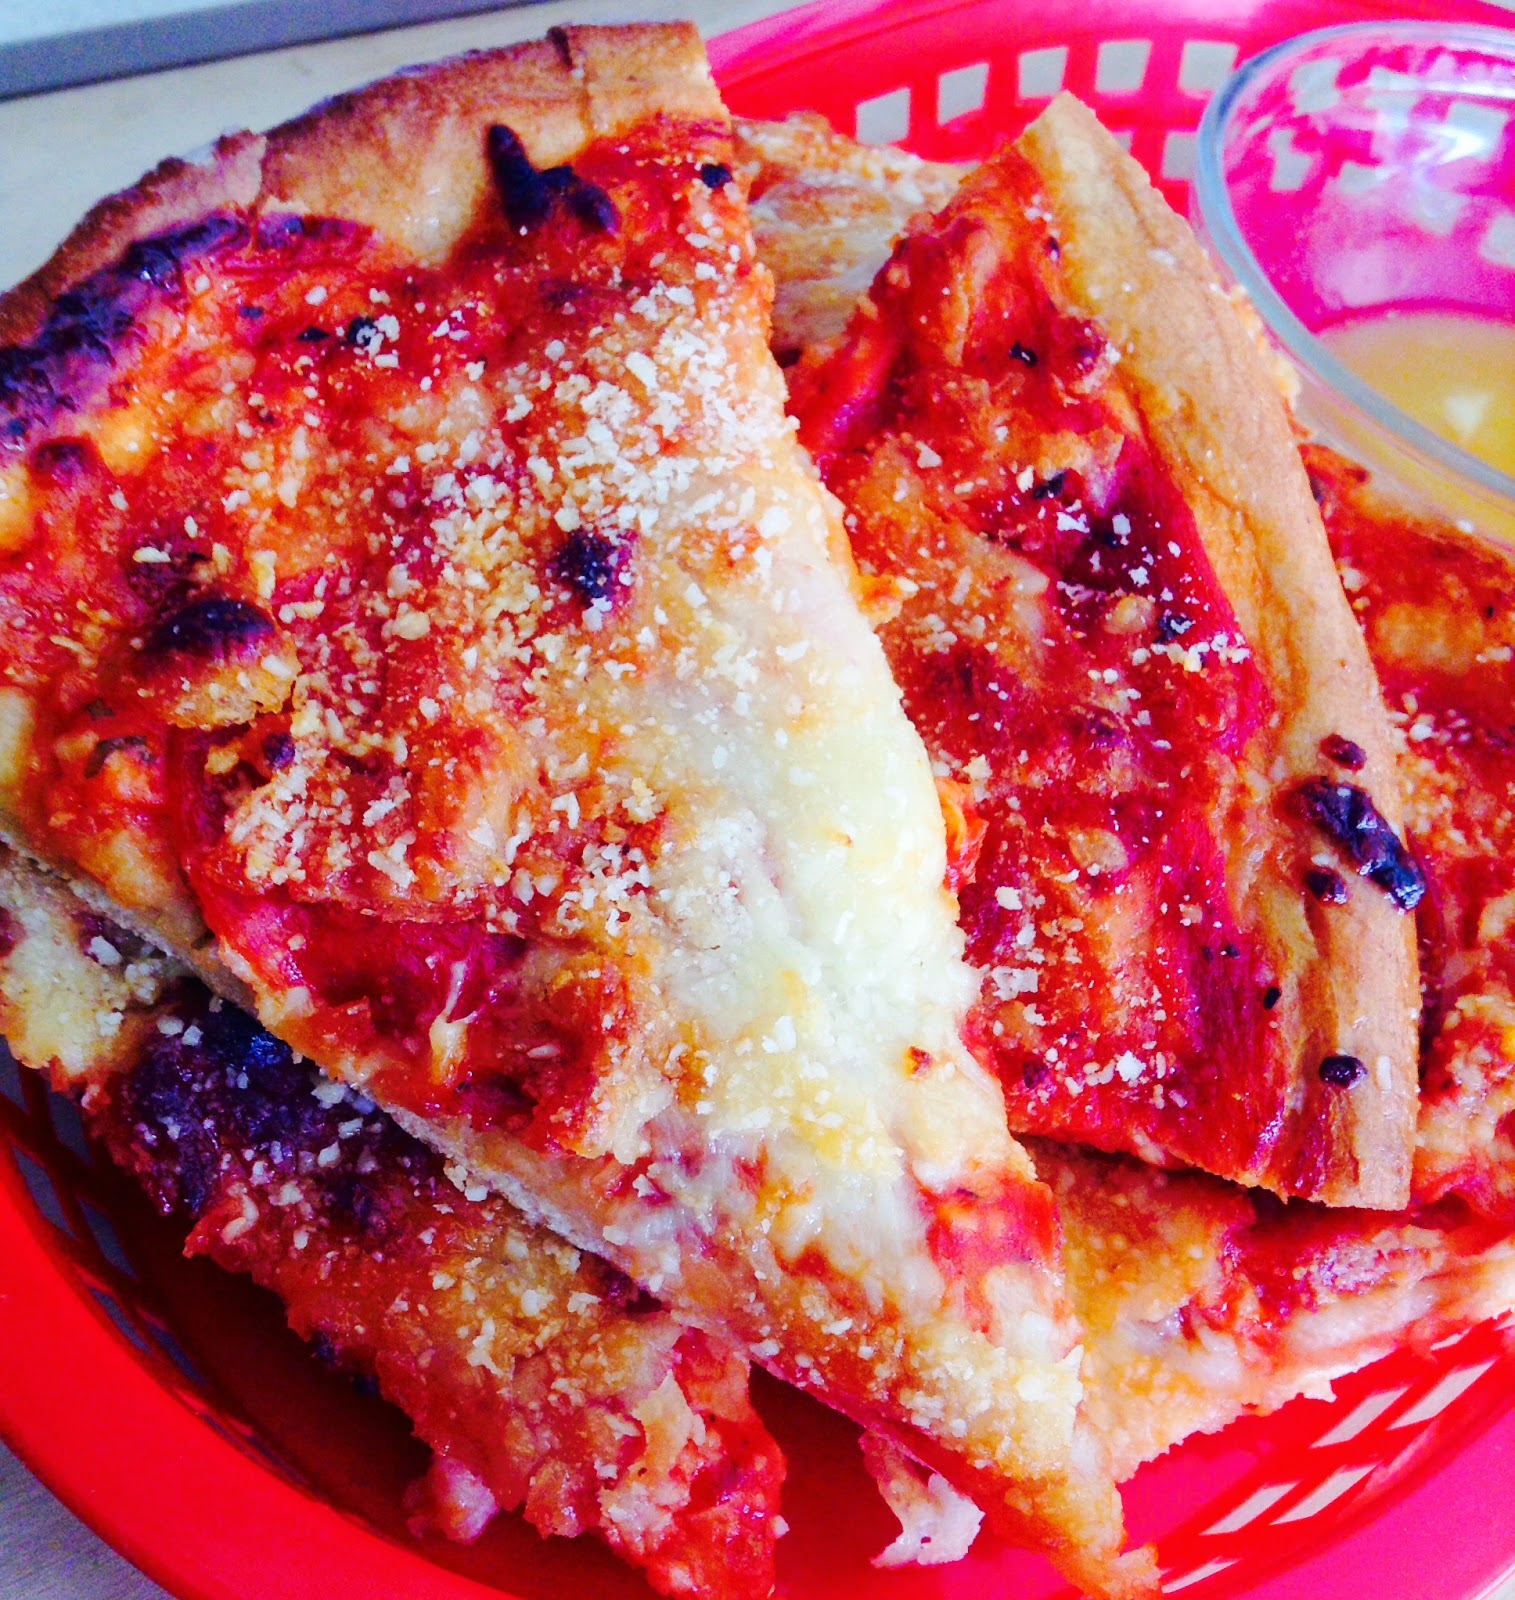
Homemade Pizza

Hello All~

Pizza is definitely one of the best loved foods in the galaxy, and will probably stay that way for many centuries; no matter what the quote "All good things must come to a end" says.

This is my mom's home-made recipe for pizza that I absolutely LOVE.


Yummy, huh?


Let's bake!


~Ingredients~


  • 1-3/4 to 2-1/4 cups all-purpose flour
  • 1 envelope ( peferably's Fleischmann's® Pizza Crust ) Yeast
  • 1-1/2 teaspoons sugar
  • 3/4 teaspoon salt
  • 2/3 cup very warm water (120 to 130°F)*
  • 3 tablespoons oil
  • 1/2 to 1 cup pizza sauce   
  •   Bacon and Pepperonis (Other toppings as desired)
  • 1 to 2 cups of shredded mozzarella cheese 
  • Parmesan cheese
  •  Garlic Powder
  •  Butter

~Pizza Dough~


First, combine 1 cup flour, undissolved yeast, sugar and salt in a large bowl.  Add very warm water and oil; mix until well blended, about 1 minute. Gradually add enough remaining flour to make a soft dough.  Dough should form a ball and will be slightly sticky. Knead on a floured surface, adding additional flour if necessary, until smooth and elastic, about 4 minutes.

~Making the pizza~

Pat dough with floured hands to fill greased pizza pan or baking sheet, or roll dough on a floured counter to 12-inch circle; place in greased pizza pan or baking sheet.  Form a rim by pinching the edge of the dough.

If you want, put the cheese on first ( Trust me), then the sauce, then your desired toppings,then more cheese.

~Cooking~

Bake on lowest oven rack for 12 to 15 minutes, until cheese is bubbly and crust is browned.

~Garlic Sauce~

The garlic sauce is very simple. Put butter and garlic powder in a microwave-safe bowl and heat it up for 10 seconds or less. Add more garlic or butter if needed.

 ~Dressing & Eating~

Take the pizza out of the oven. Sprinkle parmesan on the pizza and brush             ( a new paintbrush will do the job) the garlic sauce on the crust. Save some of the garlic sauce to dip if desired.


Eat and Enjoy :)


Please leave comments; if you have a recipe you would like to share, please, share it! 


Toodles!


Tuesday, March 11, 2014

The Dream Jar

Welcome~

Sorry I have been gone soooooooo long! I had all these tests, then I got addicted to DrawQuest, and.....well, yah. Now, enough with the excuses. Let's craft!

Today we shall learn to make a dream jar.


This is what you'll need:

  • Glitter spray
  • Keys (Tiny Ones)
  • Metallic Spray Paint
  • Ribbon of your choice
  • Hot Glue, modge podge, and regular glue
  • Glitter of your choice
  • A Jar!

First, take your jar (without the lid) and glitter spray it on the inside and outside in an even coat. Don't forget to lay out some cardboard so your furniture won't become glittery! (Trust me, it's not as glamorous as it might seem) 

Now, at the bottom of the jar, make a mark around the jar with a marker where you want your glitter to be. Once that is done, use regular glue to cover every inch of space below and on the mark line. (see first pic if still confused) Now, sprinkle the glitter on the glue. Repeat as necessary. Use the modge podge on the glitter once the glue is dry. The modge podge will make sure glitter won't sprinkle down and make a mess later on.

Now, take the lid and glue your keys on it with the hot glue. Once that is dry, you are free to spray paint the lid, making sure the keys are sprayed too.

The last step is here!! Take the ribbon and tie it into a bow on the jar, also making sure the ribbon won't get in the way of taking off the lid. Glue the bow if necessary.


You can use the dream jars to put your (duh) dreams in it! Just make sure the jar is in a secret place...like where you keep your secret stash of candy!


Goodbye, All! 

And I solemnly swear I’ll blog more often

Monday, February 17, 2014

T-Rexes & Other Stuff

Hello <3


Funny Post Day! Yay!


So please,


Everybody does deserve one.


I wuv T-Rexs... i mean...not like the ones in Jurassic Park, but  the cute ones.

Like these!!!


Ok. That is all...bye

(awkward goodbye)