Saturday, March 22, 2014

Homemade Pizza

Hello All~

Pizza is definitely one of the best loved foods in the galaxy, and will probably stay that way for many centuries; no matter what the quote "All good things must come to a end" says.

This is my mom's home-made recipe for pizza that I absolutely LOVE.


Yummy, huh?


Let's bake!


~Ingredients~


  • 1-3/4 to 2-1/4 cups all-purpose flour
  • 1 envelope ( peferably's Fleischmann's® Pizza Crust ) Yeast
  • 1-1/2 teaspoons sugar
  • 3/4 teaspoon salt
  • 2/3 cup very warm water (120 to 130°F)*
  • 3 tablespoons oil
  • 1/2 to 1 cup pizza sauce   
  •   Bacon and Pepperonis (Other toppings as desired)
  • 1 to 2 cups of shredded mozzarella cheese 
  • Parmesan cheese
  •  Garlic Powder
  •  Butter

~Pizza Dough~


First, combine 1 cup flour, undissolved yeast, sugar and salt in a large bowl.  Add very warm water and oil; mix until well blended, about 1 minute. Gradually add enough remaining flour to make a soft dough.  Dough should form a ball and will be slightly sticky. Knead on a floured surface, adding additional flour if necessary, until smooth and elastic, about 4 minutes.

~Making the pizza~

Pat dough with floured hands to fill greased pizza pan or baking sheet, or roll dough on a floured counter to 12-inch circle; place in greased pizza pan or baking sheet.  Form a rim by pinching the edge of the dough.

If you want, put the cheese on first ( Trust me), then the sauce, then your desired toppings,then more cheese.

~Cooking~

Bake on lowest oven rack for 12 to 15 minutes, until cheese is bubbly and crust is browned.

~Garlic Sauce~

The garlic sauce is very simple. Put butter and garlic powder in a microwave-safe bowl and heat it up for 10 seconds or less. Add more garlic or butter if needed.

 ~Dressing & Eating~

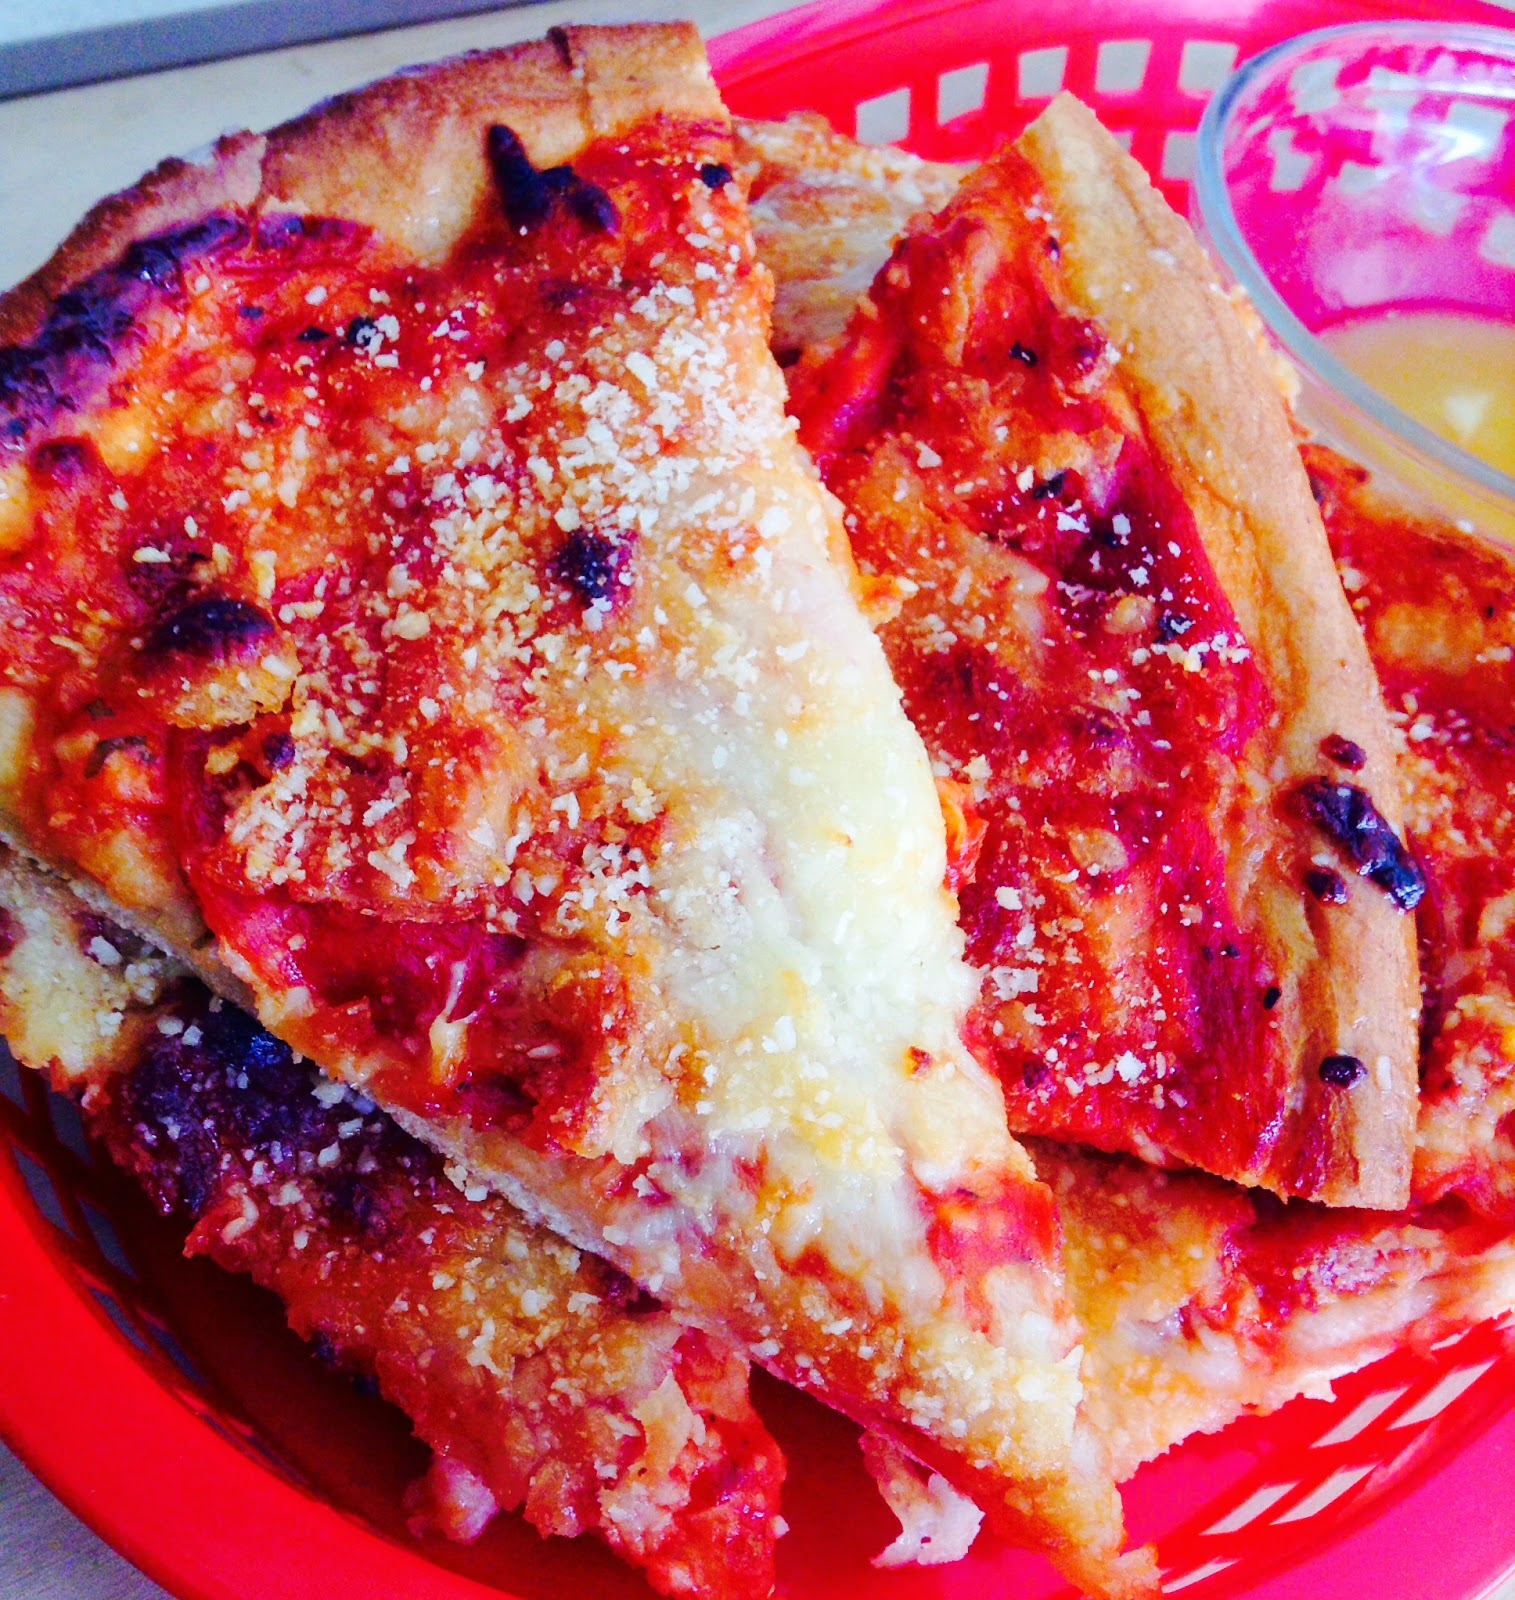
Take the pizza out of the oven. Sprinkle parmesan on the pizza and brush             ( a new paintbrush will do the job) the garlic sauce on the crust. Save some of the garlic sauce to dip if desired.


Eat and Enjoy :)


Please leave comments; if you have a recipe you would like to share, please, share it! 


Toodles!


Tuesday, March 11, 2014

The Dream Jar

Welcome~

Sorry I have been gone soooooooo long! I had all these tests, then I got addicted to DrawQuest, and.....well, yah. Now, enough with the excuses. Let's craft!

Today we shall learn to make a dream jar.


This is what you'll need:

  • Glitter spray
  • Keys (Tiny Ones)
  • Metallic Spray Paint
  • Ribbon of your choice
  • Hot Glue, modge podge, and regular glue
  • Glitter of your choice
  • A Jar!

First, take your jar (without the lid) and glitter spray it on the inside and outside in an even coat. Don't forget to lay out some cardboard so your furniture won't become glittery! (Trust me, it's not as glamorous as it might seem) 

Now, at the bottom of the jar, make a mark around the jar with a marker where you want your glitter to be. Once that is done, use regular glue to cover every inch of space below and on the mark line. (see first pic if still confused) Now, sprinkle the glitter on the glue. Repeat as necessary. Use the modge podge on the glitter once the glue is dry. The modge podge will make sure glitter won't sprinkle down and make a mess later on.

Now, take the lid and glue your keys on it with the hot glue. Once that is dry, you are free to spray paint the lid, making sure the keys are sprayed too.

The last step is here!! Take the ribbon and tie it into a bow on the jar, also making sure the ribbon won't get in the way of taking off the lid. Glue the bow if necessary.


You can use the dream jars to put your (duh) dreams in it! Just make sure the jar is in a secret place...like where you keep your secret stash of candy!


Goodbye, All! 

And I solemnly swear I’ll blog more often